Adding a SharePoint Calendar
Step 1:
Open your web browser and log into to UF Connect site that has the calendar.
Step 2:
Open the calendar you would like to add
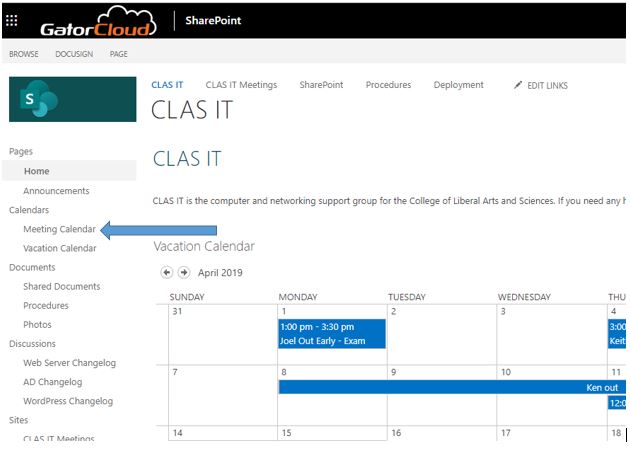
Step 3:
Click on the calendar tab on the top
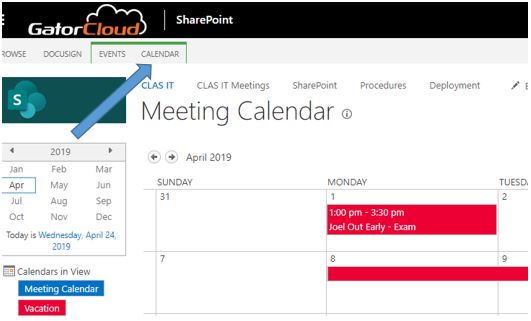
Step 4:
Click on the Connect to Outlook button.
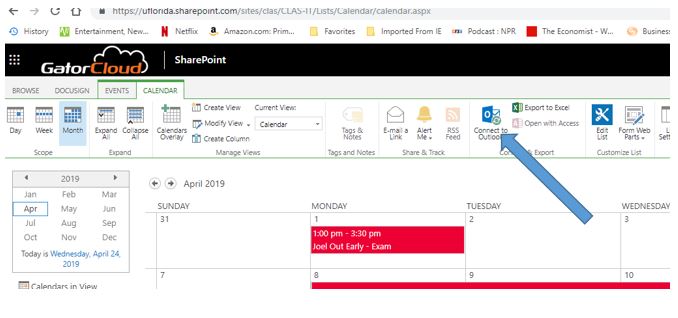
Step 5:
Open up Outlook and you will receive a pop-up asking if you want to connect your SharePoint Calendar to Outlook. Click Yes.
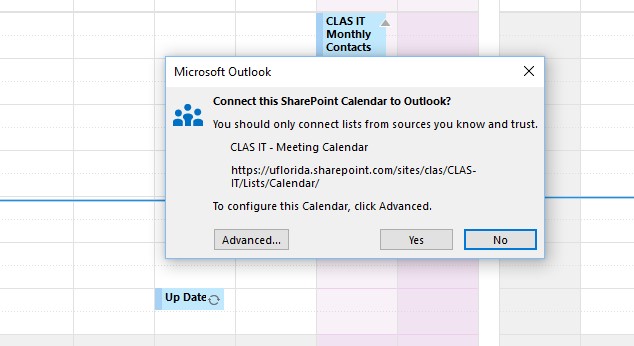
Step 6:
Congratulations! Your calendar is now connected.
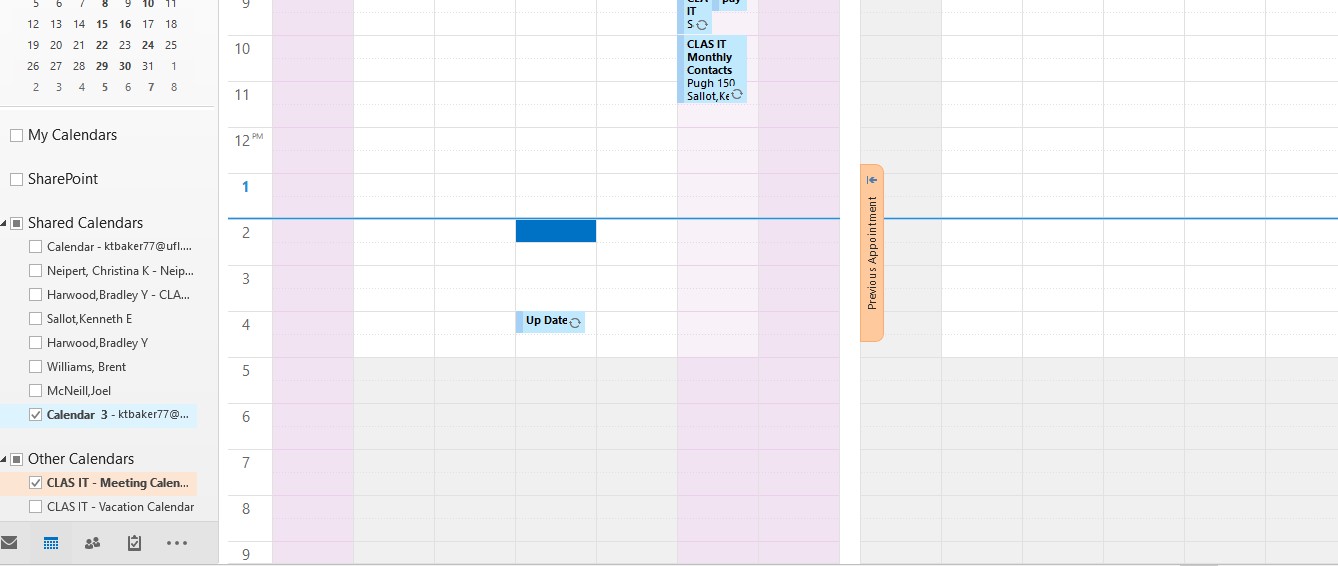
Step 7:
If you would like to hide your calendar until you need to use it, check the checkbox on the left hand side.
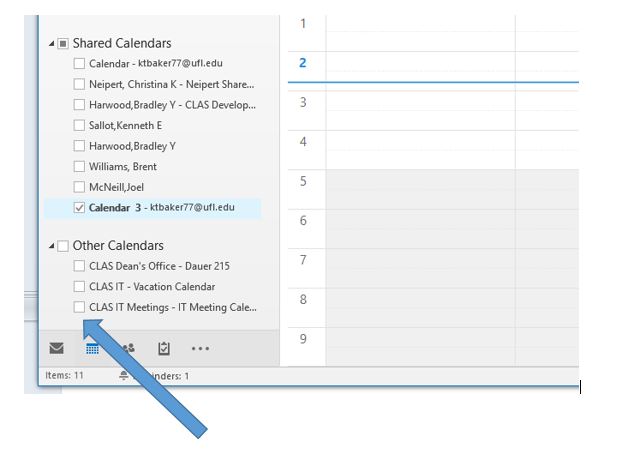
Removing a SharePoint Calendar
Step 1:
Open Outlook and view the calendar you’d like to remove.
Step 2:
Right-click the calendar name and select Delete Calendar. Note: This removes the calendar from Outlook, it does not remove any events.
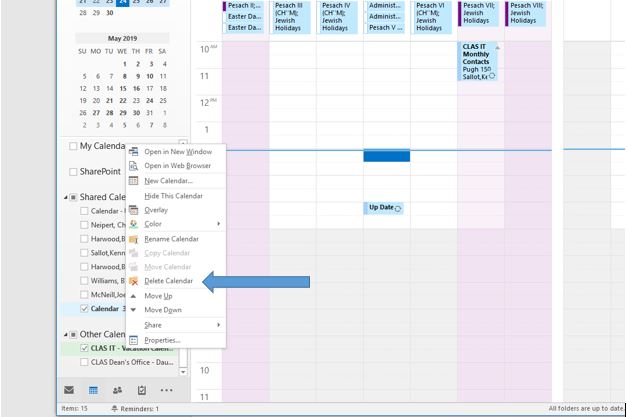
Step 3:
Click ‘Yes’ to confirm. Now the calendar will no longer appear in Outlook for any computers that you use.
You can still access the calendar via the SharePoint site or reconnect it to Outlook.